Product description:
Tips: Applying oil or grease to the tool protects the tool and makes the job smoother.
Remove the Valve Covers, Remove the Rocker arms and Rocker rails.
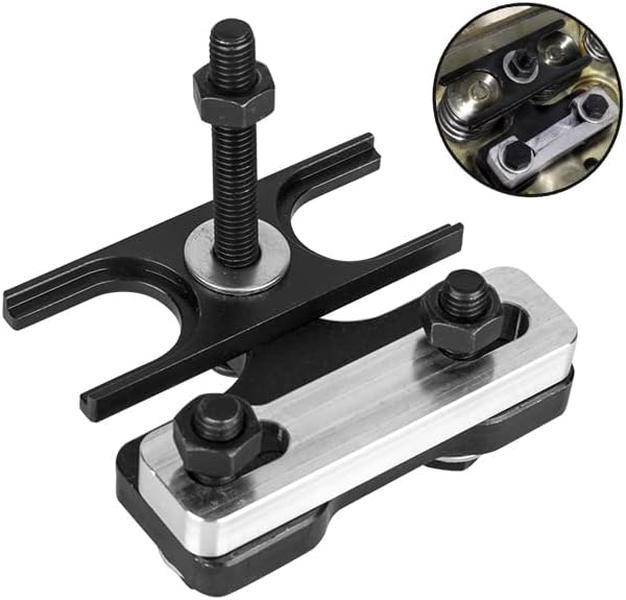
Place the Bottom Aluminum plate on the head where the rocker bolts mounted and place the middle section on top that has the stud and mount it to the head with the 2 supplied bolts make sure the tool is setting in the middle between the 2 valve springs. Hand Tighten using a ratchet and socket. Do not Over tighten you can cause damage to the head if you use a impact.
Place the top over the 2 valve springs and install supplied nut. Make sure the stud has grease on it.
Before tightening if you are using this on a head that is installed on the engine you will need to use a fitting with compressed air in the spark plug hole to keep the valves pushed close.
Slowly tighten the nut down using Hand Tool Only Do not use an impact it will cause the nut to overheat and strip threads!
After Compressing the springs you can remove the valve keepers using a magnet this will keep them from falling in the Head.
After removing keepers you can reverse the nut and slowly let the pressure off and remove the springs.
Install the new springs using the same procedure. Make sure when reinstalling the valve keepers that you get them in place so they will hold properly before releasing the pressure.

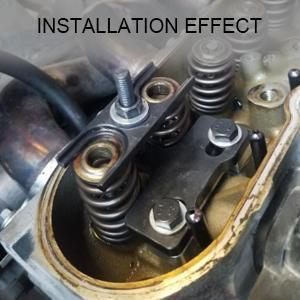
Proper installation is the first step in the Remove valve springs process

When installing, if there is an error on the left, you need to turn the T-shaped piece block before using it.

Performance levels are 12.9 and 10.9, much better than the other 8.8.

A full kit & one more Bolt.
Installation Display
Adjust Direction
High Strength